The preview for the battle can be found here where I outline how I approached the game and offered up my list.
Mission
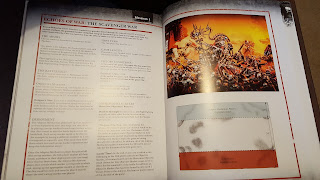
The mission we played was the scavenger war from the Fall Of Cadia book as it fit quite nicely with our fluff and armies. The idea that the Death Company Chaplain survived, retreated vowing revenge and amassed a force to ambush Typhus's zombie horde really appealed to us both. From my point of view the main problem with this mission was that it was going to be night fighting for the whole of the battle. Those extra cover saves could save Mike a handful of models that may swing the balance late game.
Armies
The 2 armies played are 1500 points of Nurgle (Mike) vs Astra Militarum + Death Company Chaplain and Death Company.
Nurgle
Plague colony formation:
Typhus
7 Plague Marine units - 5 marines, 1 with meltagun
Lost and the Damned Formation:
1 Dark Apostle
4 x 10 man units Cultist Zombies
Simple yet very effective.
The Plague Colony formation means that any enemy unit within 7" of a Plague Marine unit in the fight sub phase reduces WS, I & T by 1 for the duration of the phase.
The Lost and the Damned Formation means that any Cultist Zombie Unit that is completely destroyed gets a roll on a D6. On a 4+ they get resurrected and get placed in ongoing reserve but with the outflank special rule!!!
Both of these formation rules mean that once the Plague marines hit combat they become very good especially with their T5 and Feel No Pain as well as the modifiers to the enemy statistics. Also the zombies can be used as a meat shield with a 50% chance of coming back if they get killed. Worse still - they get to Outflank!! As an Astra Militarum player even castling in a corner will prove difficult if a unit of these turn up at the door and tie me up in combat!
Astra Militarum/Blood Angels
Unbound
Death Company Chaplain
9 Death Company - 1 Power Sword, 1 Power Axe, 1 Power Fist
Combined Arms Detachment
Company Command Squad - Lascannon
Platoon
Platoon Command Squad - 4 Flamers, Chimera
2 Troop Squads - 2 Lascannons, Commissar
Heavy Weapon Squad - 3 Autocannons
Heavy Weapon Squad - 3 Missile Launchers
Veterans - 3 Plasmaguns, Chimera
Leman Russ - Executioner
Leman Russ - Punisher
For pictures of the Emperors Feth check out the Gallery (Here).
Lots of dakka here. The plan was to hold a flank with all of the infantry and sit back and shoot the cultists while the tanks and chimeras could move up the flanks to get to the Plague Marines with Plasma. The only problem was going to be night fight all through the battle which would give the Nurgle army a 3+ save if they were in cover and so I need to make sure that my plasma vets and executioner would be free to move at the right time to negate this.
Deployment
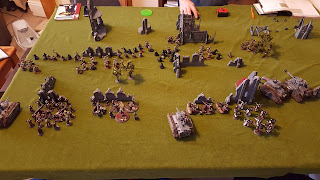
I placed 3 objective markers in my deployment zone and then 'deployed' first using pieces of numbered paper placed on the battlefield to secretly mark where my Astra Militarum units would be. Mike then deployed his Nurgle army following which I put my actual units on the battlefield. At this point I was also allowed to choose which mysterious objectives the objective markers would be. I chose to re-roll to hit rolls of 1 seeing as all of my heavy weapon squads were holding the objectives.
Mike positioned his Nurgle army directly opposite my 3 objectives with the zombies as meatshields in front of the Plague Marines. This was a good move as it would give them extra saves against the executioner but they would all be bunched up ready for the templates. The Astra Miltarum set up with good fire lanes across the battlefield and spaces at the sides and middle for the vehicles to manouvre. The Death Company were set back a little ready to jump over and charge any Plague marine units once the zombies had been eliminated.
The Game
Mike had the first turn according to the mission rules and did what any zombie leader would have done - CHARGE!! Nothing much else happened here.
The Astra Militarum go to work and zombies begin to fall all over the battlefield. This was a good turn in all - especially for the executioner who destroyed the packed nurgle infantry in the middle of the field.Over the next 2 turns the Nurgle forces get closer and the decision making became much harder for me with the Astra Militarum. Target priorities as the marines and zombies closed in, when to move the plasma vets and flamers forward, when and if I should pull the main infantry back or squeeze another round of shooting in and when to commit the Death Company to the fight. In the 3rd and 4th turns all of these decisions were made and, certainly 1 of them broke the army...
The Death Company jump into action turn 3.... and fail their charge!!!! GAH!!
This allowed the Plague marines to charge them instead not only reducing WS, T and I but the DC also lose their bonus attacks for Rage and Furious Charge. This signalled the end of another disappointing battle for them.
The brave infantry held their ground and went for the extra turn of shooting rather than fall back.
The combined troop squads are amazing in combat slowly grinding the Plague marines down even though they had reduced stats. The commissar was ruthless executing infantry men left right and centre to keep them in the fight. Eventually they succumbed to a double attack from 2 squads of outflanking zombies late in the game.
Typhus scythed his way down the left flank towards the 2 tanks and the Death Company easily slaying the Chaplain in a challenge while the Death Company marines couldn't handle the amazing close combat prowess of the Plague Marines. He also cast gets hot on the punisher tank who just couldn't resist firing anyway and duly wrecked itself!!
At this point in the battle it could have gone either way still even though Papa Nurgle was gaining the upper hand. The failed charge of the Death Company hurt the Imperials but a good round of shooting from the veterans, executioner and platoon command squad and a good combat for the combined troop squad would see a huge swing in the tide of battle...
The Plasma vets on the left picked their moment and disembarked to deal death to a Plague Marine squad left out in the open after a failed charge. Even though they rolled brilliantly the Plague marines rolled better re-rolling 1's for their feel no pain rolls and duly passing them all - GAH!!
The Platoon Command Squad in the middle of the field pounced and roasted the zombies and Plague Marines positioned their. As the smell of burned flesh cleared the Plague marines strolled through the thinning smoke and hacked their way through the squad mercilessly. GAH!!!
The Plague Marine holds up the combat just long enough for 2 squads of zombies to turn up on THAT side via outflank - GAH!!!
Now Mike is well on top as Papa Nurgle has blessed his dice and his army can literally feel no pain!
Typhus begins to give chase to the executioner while the veterans and 2 chimeras desperately try to whittle down the Plague Marines still left...
Eventually the veterans, a chimera and executioner go down leaving just one lone chimera stopping the tabling. I did finally get Mike down to 14 models but it was too many in the end and a well deserved victory.
Comment
I thoroughly enjoyed this game. It was tough and I lost but very fluffy with the mission and the armies we used.
The formations seem to be the big difference between the 2 armies. The Astra Militarum don't get any decent formations to buff the army and Nurgle get 2 here that affect the entire force and the opponents army too! Since the battle I have been studying the Astra Militarum codex and supplements and the best thing I can find is Knight Commander Pask so expect to see him next time Mike!
I also struggled with 4 elements during this game:
1. The bloody Death Company! Since I have had them they have done nothing for me and this proved the same in this game. I launched them forward to take apart a Plague Marine squad and they duly failed their charge, got counter-charged then taken apart by Typhus and his squad - Gah! I can literally do no right with these guys at the moment - expect them not to be in the list for the next rematch!
2. Target priority. This used to be my strength back in the tournament days of 5th Ed. In this game I left 2-3 units with 2 men left alive instead of finishing them. Come the last few turns those smaller units were too numerous to deal with and kept whittling away at my army. Need to make sure that I completely wipe out units next time.
3. Night fighting hurt a little. With all of my shooting those extra few saves kept a handful of Mike's models alive at the end of the game. If he had 7 models instead of 14 left at the end would that have made a difference? Maybe? However that was the mission and I need to deal with it
4. Mike's feel no pain rolls! Damn who needs an armour save when you can make a hundred 5+ saves in a row!!!
Let me know what you guys think about strategies to beat Mike's army or of experiences you may have had against it.
James
fourdadsoftheapocalypse.blogspot.co.uk – A blog about Warhammer 40k and the Horus Heresy by four Dads


No comments:
Post a Comment